Guide · SketchUp tiling
How to lay out wall tiles around a niche in SketchUp
(and keep a joint on your design axis)
By Marek Novák, developer of TileBuilder. Updated 12 October 2026.
A wall with a niche is where tile layouts go wrong: you end up with thin slivers at the edges, or a joint that misses the centre of the niche by a few millimetres. The fix is the same in any tool: decide the important line first, then build the layout from it.
1. Decide the line that matters
Pick one vertical or horizontal line the layout must respect. Typical choices:
- a joint exactly on the centre line of the niche,
- a joint on the edge of the niche,
- a tile centre on the axis of a window, a vanity or a mirror.
Write down its position from the corner of the wall (for example X = 1200 mm). Everything else follows from it.
2. Native method in SketchUp (no extension)
- Draw the surface. Draw the wall as a face and cut the niche as an opening (draw its rectangle on the face and delete the inner face).
- Mark the axis. With the Tape Measure tool, drag a guide to your line (type
1200for 1200 mm from the corner). - Make one tile. Draw a rectangle with the tile size (for example
600,300), push/pull it to the real thickness (for example10), and make it a group or component. - Use the pitch, not the size. If the joint is 2 mm, the repeat distance is tile + joint (602 × 302 mm).
- Start from the axis. Place one tile so that a tile edge (or its centre) sits on the guide. Copy it with the Move tool (hold Ctrl/Option, type the pitch and a multiplier, e.g.
602then5x) to the left and to the right, then rows upward and downward. Because every row starts at the guide, the joint stays on your axis. - Trim at the opening and edges. Tiles that cross the niche or the wall edge must be cut. In SketchUp Pro you can intersect or subtract the niche volume; otherwise draw the cut outline and erase the part that falls outside. Work on a copy of the model.
- Check for slivers. Look at the first and last tile in every row and column. If a piece is thinner than you are willing to cut on site (many installers avoid very small pieces), shift the whole grid or choose a different axis rule and repeat.
- Count. Count whole tiles and cut tiles separately; cut tiles are unique objects, so list them from your selection rather than relying on the component count.
Note: steps 5 and 6 use standard SketchUp tools (Move with copy and an array multiplier, Intersect Faces or Solid Tools). Exact behaviour and menu names can differ slightly between SketchUp versions, so try them on a copy of your model first.
This works, but steps 5–8 are repetitive: every change to the axis, the tile size or the joint means rebuilding the grid.
3. Doing the same with TileBuilder FREE
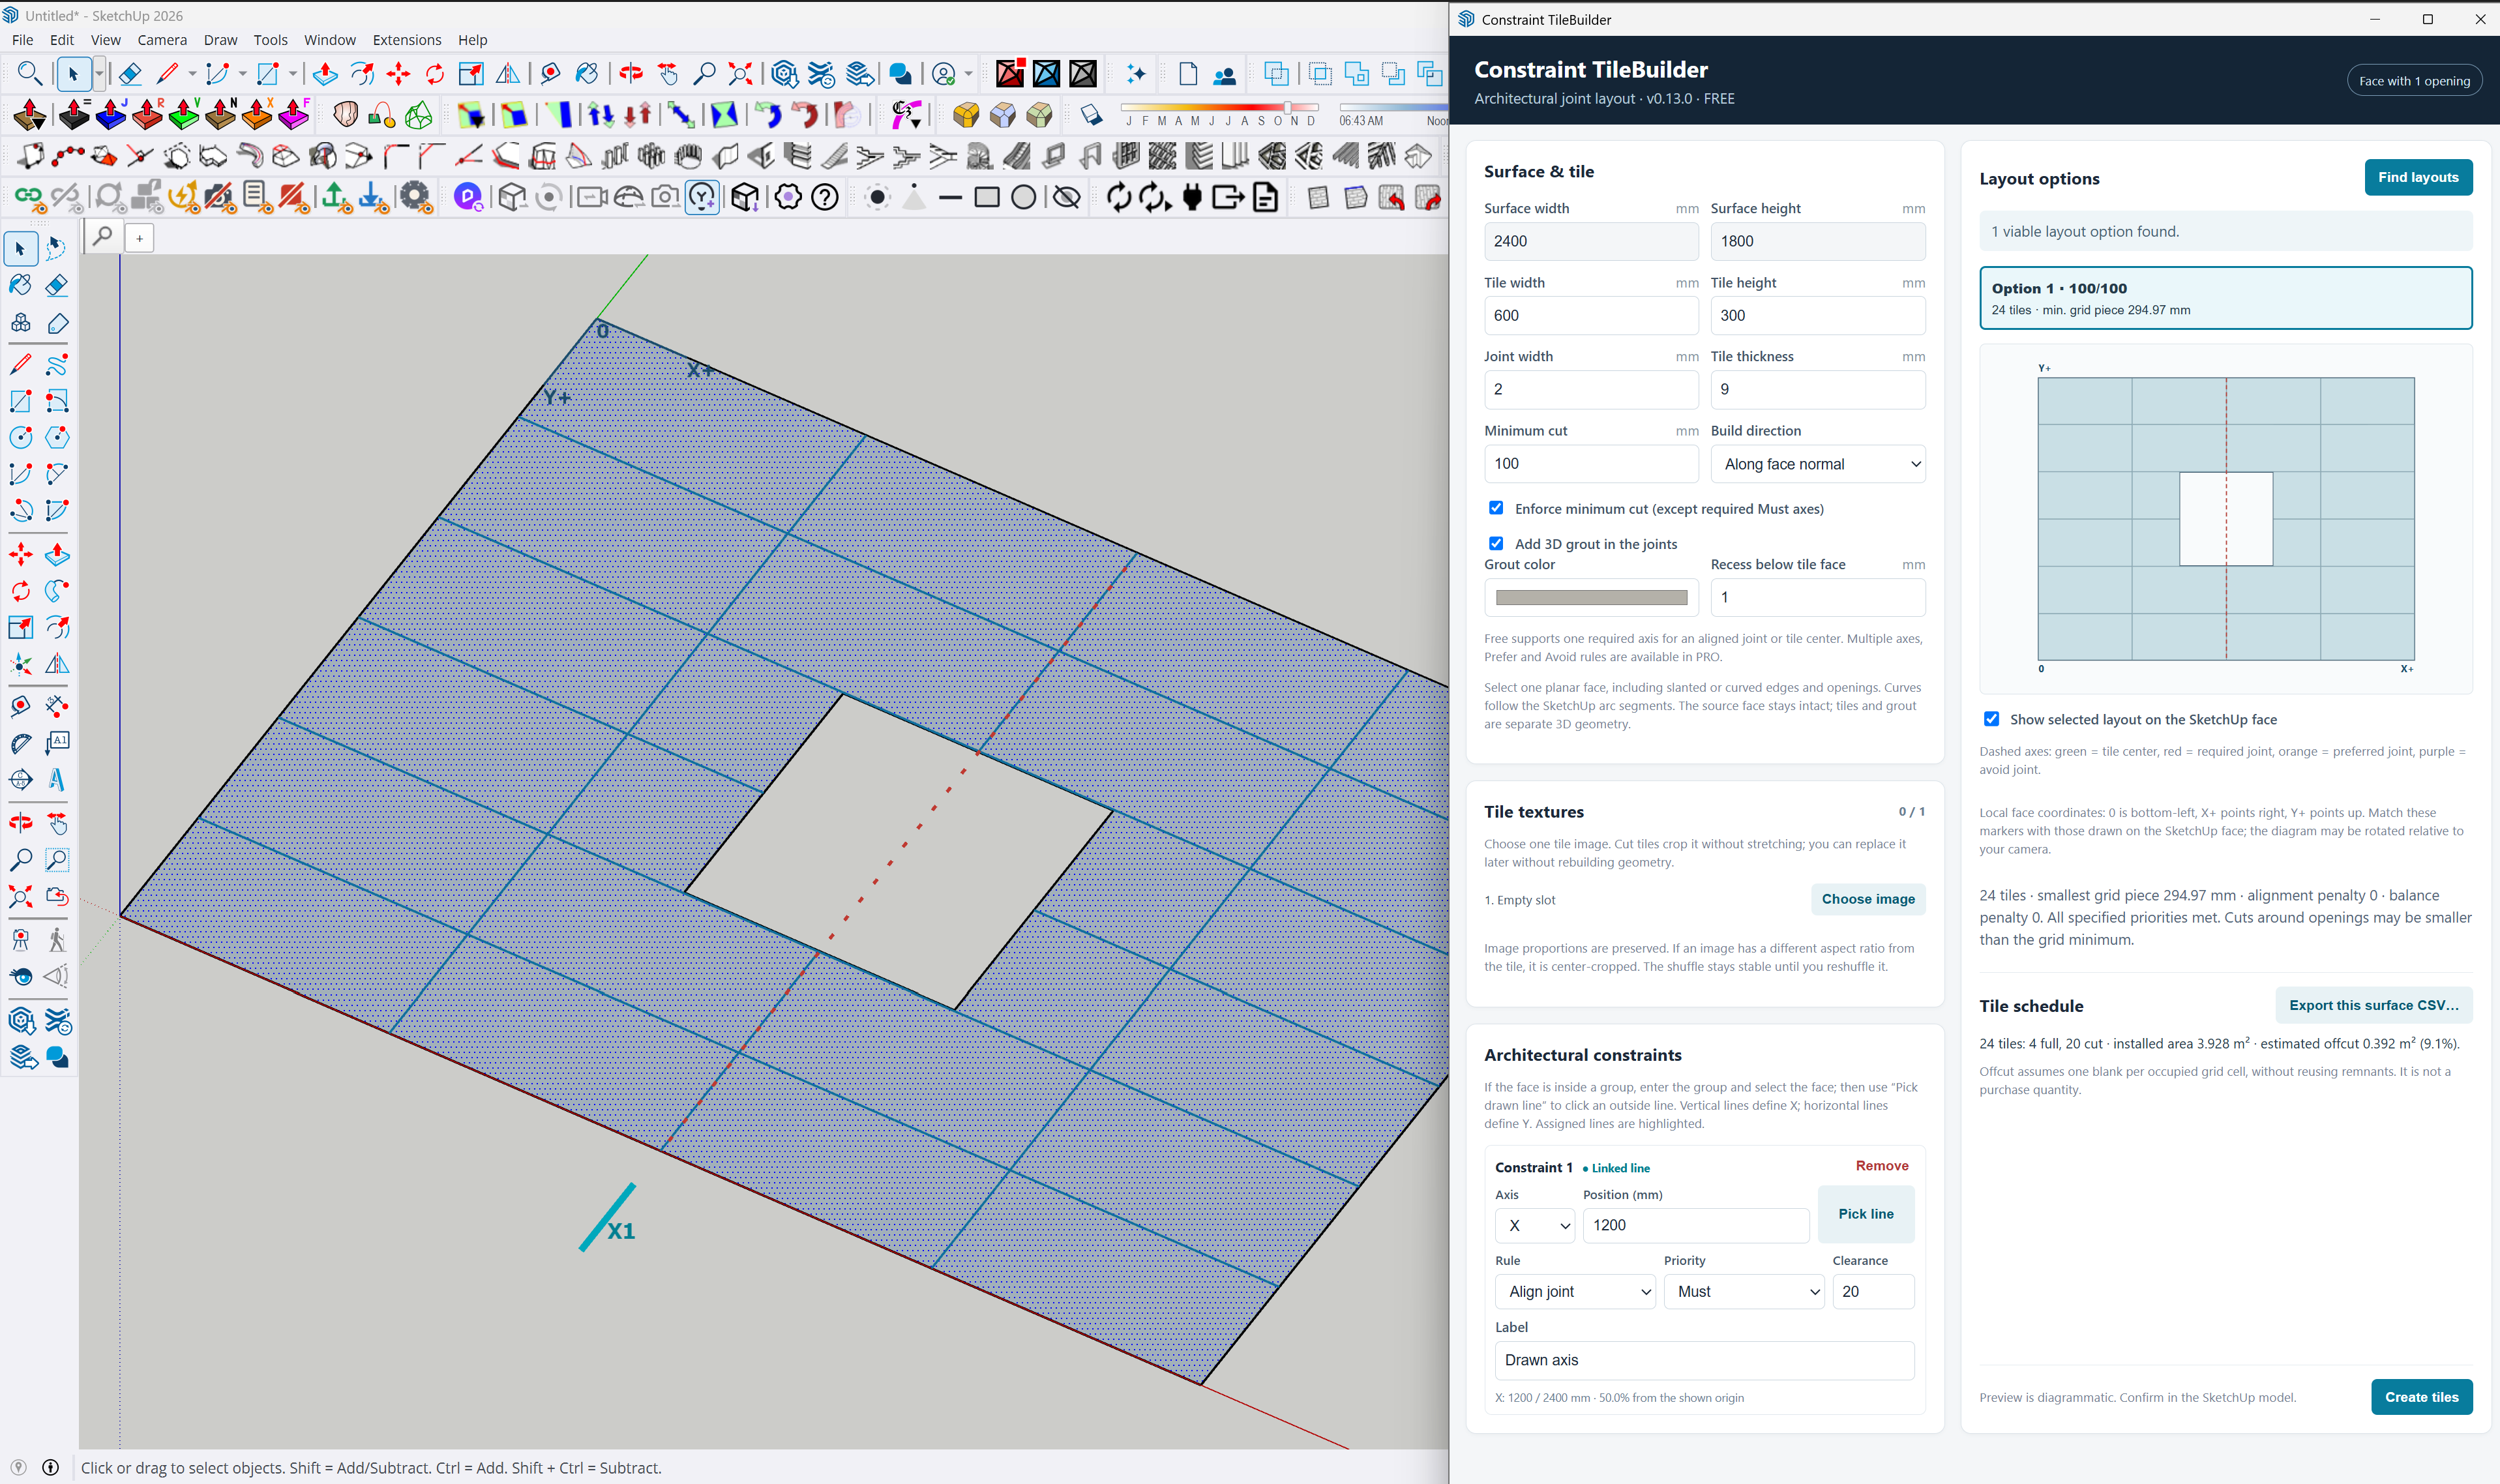
- Select the wall face (the niche stays in the layout).
- Enter tile size and joint width, for example 600 × 300 mm and 2 mm.
- Pick the line you drew in the model and make it a required joint at your axis (X = 1200 mm in the example).
- Click Find layouts. In the example (a 2.4 × 1.8 m wall with a 600 × 600 mm niche), TileBuilder reports 24 tiles (4 full, 20 cut), and the smallest piece is 295 mm.
- Create the 3D tiles with real thickness and recessed grout.
- Export the quantities for the surface as CSV.
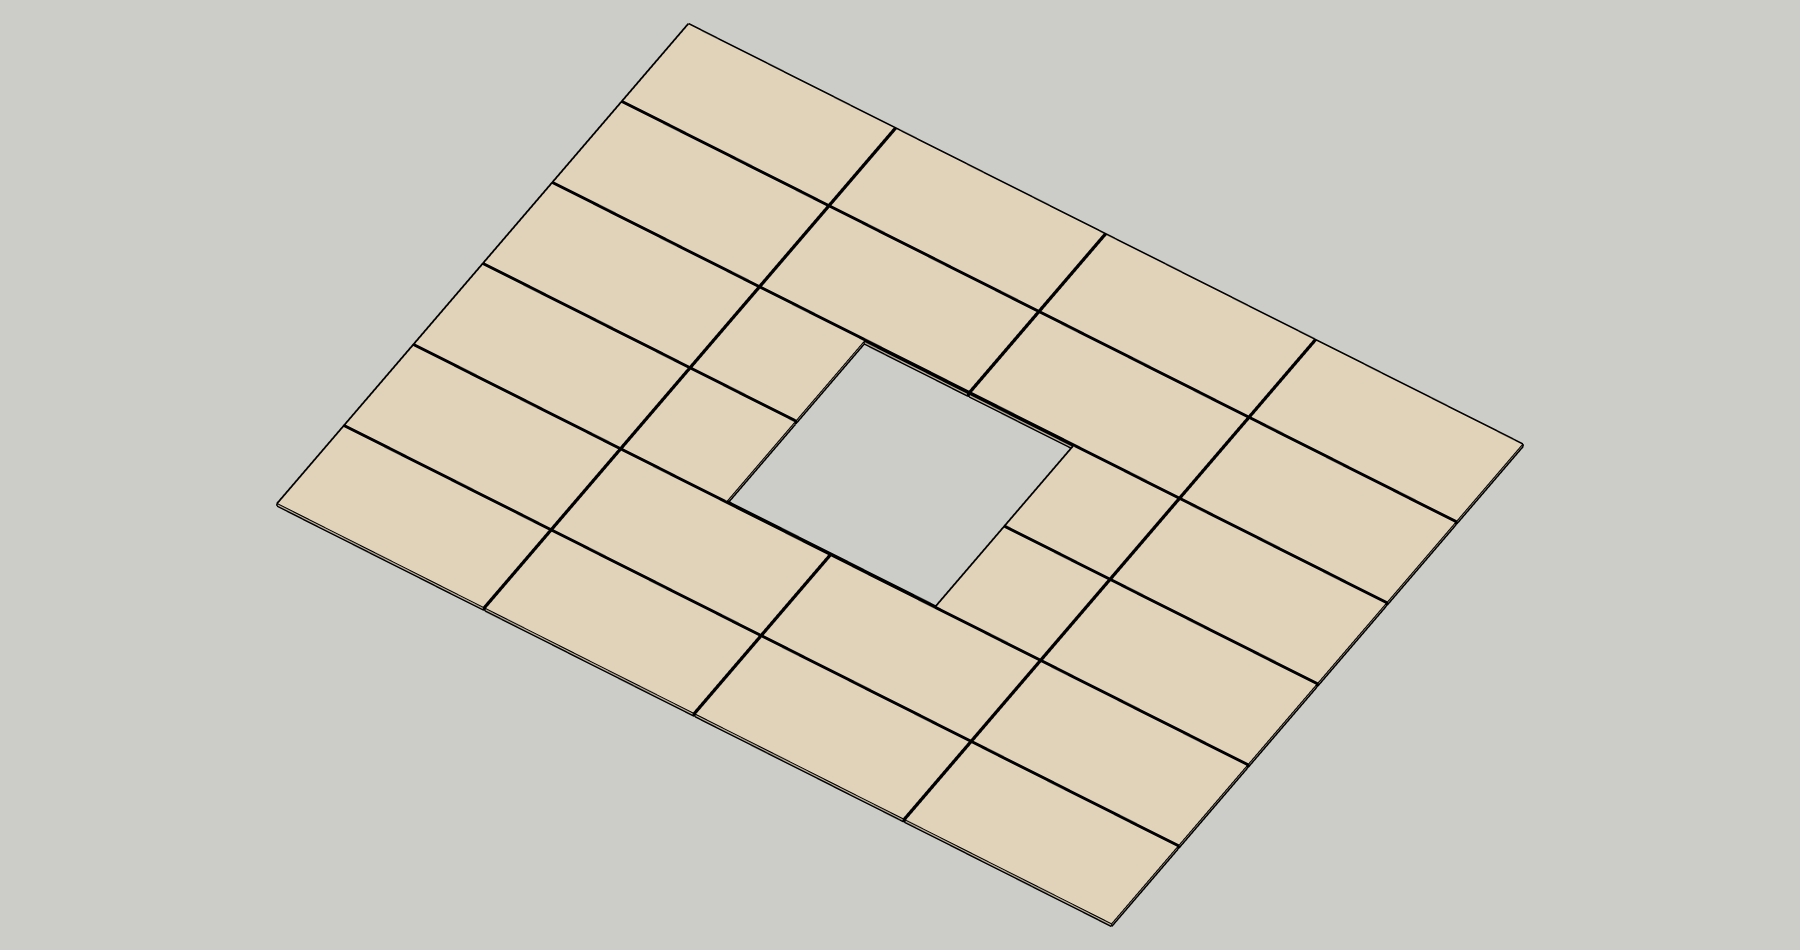
What FREE does: one required axis, the best layout for the selected surface, one texture, openings and curved boundaries, selected-surface quantities. Several axes, scored alternatives and whole-project schedules are PRO.
Status of this build: FREE 0.13.0 public beta. Automated checks passed in SketchUp 2026 on macOS; clean installation and new Windows testing of the stripped FREE package are still pending; the RBZ is unsigned. Back up your model first. No time-saving figure is claimed — measure it on your own wall.
4. Quick checklist
- Choose the axis first, then the tile size and the joint.
- Inspect the first and last tile in each row and column.
- Keep a copy of the model before generating or cutting.
- Compare two axis choices (joint on the niche centre vs. on the edge) before you order tiles.
Exported quantities are geometric estimates, not a purchase order. Check packaging, breakage and site tolerances separately. Independent developer; not affiliated with or endorsed by SketchUp or Trimble.